Welcome to ZenPass! If your provider has recently moved over from another platform, you’re in the right place. We’ve already set up your account, and any past sessions, packages, and upcoming appointments have been securely imported.
This article will guide you through activating your account, using your customer portal, and understanding what’s already been carried over.
Step 1: Activate Your ZenPass Account
You don’t need to create an account from scratch — your practitioner has already set it up for you.
To log in for the first time:
- Check your email inbox for a message from ZenPass (look for a subject like “Activate your ZenPass account” or “Welcome to your new client portal”).
- Click the secure activation link in that email.
- You’ll be prompted to set a password for your account.
- Once your password is confirmed, you’ll be logged into your personal ZenPass client portal.
Can’t find the email?
Try searching for “ZenPass” in your inbox or spam folder. If you still don’t see it, contact your practitioner and ask them to resend your activation email.
Step 2: Explore Your Customer Portal
Once you’re logged in, you’ll have access to your full client profile – everything in one place.
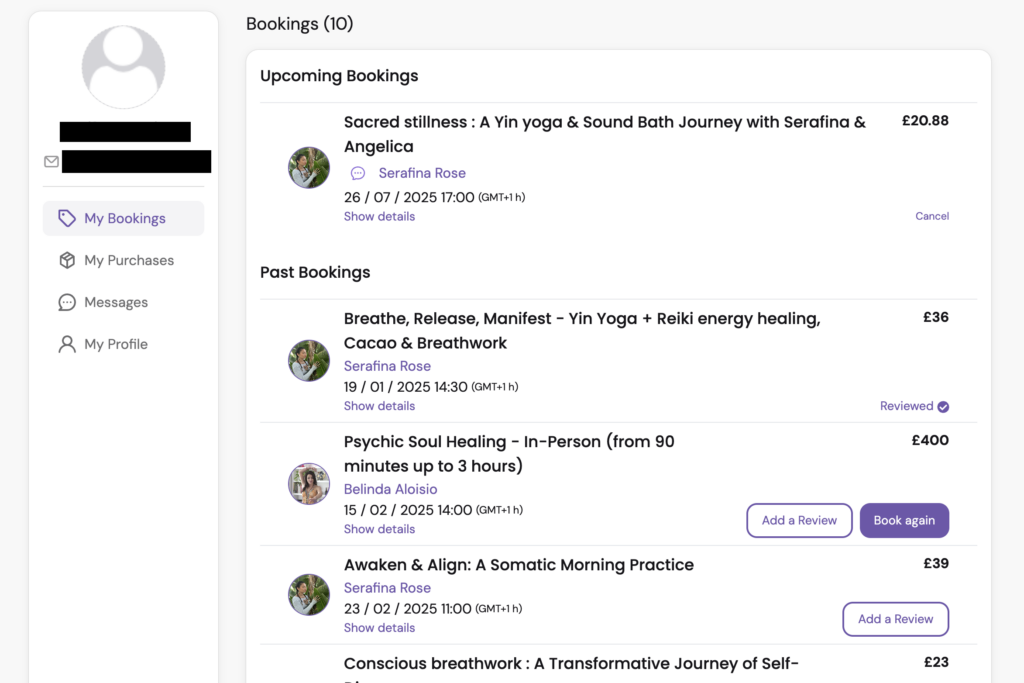
Here’s what you can do inside your portal:
- View upcoming sessions that were booked through the previous system
- See your session history
- Download receipts or appointment records (if enabled by your practitioner)
- Complete any required intake forms or digital waivers
- Reschedule or cancel upcoming appointments (based on your practitioner’s policies)
- Purchase new packages or add-ons
- Update your contact details or preferences
Step 3: What Was Imported?
To make your transition seamless, your practitioner imported:
- Your upcoming appointments
- Your past session history
- Any active packages, bundles, or credits
- Required forms and waivers linked to your profile
- Basic account details (name, email, and sometimes phone number)
If anything looks missing, don’t worry — your practitioner can easily update or reassign sessions or credits within ZenPass. Please contact us at contact@zen-pass.com
How Do I Schedule New Sessions ?
If you’ve purchased a package or membership, scheduling new sessions is simple and only takes a few taps:
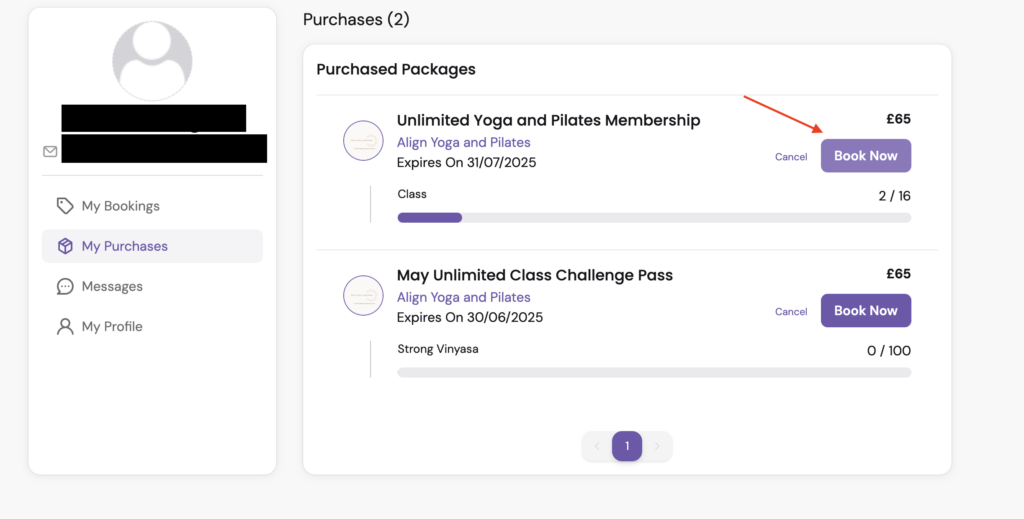
To schedule a session:
- Log in to your ZenPass client portal.
- Go to the “My Purchases” tab in the menu on the left.
- Find the package you’d like to use (e.g. “Unlimited Yoga and Pilates Membership”).
- Click the “Book Now” button next to the package.
- Choose a class or session from the available options and confirm your booking at checkout.
Once booked, your session will appear under “My Bookings.” You’ll also receive a confirmation email with all the details.
How Do I Purchase a New Package?
If you’d like to purchase a new package with your practitioner, follow these simple steps:
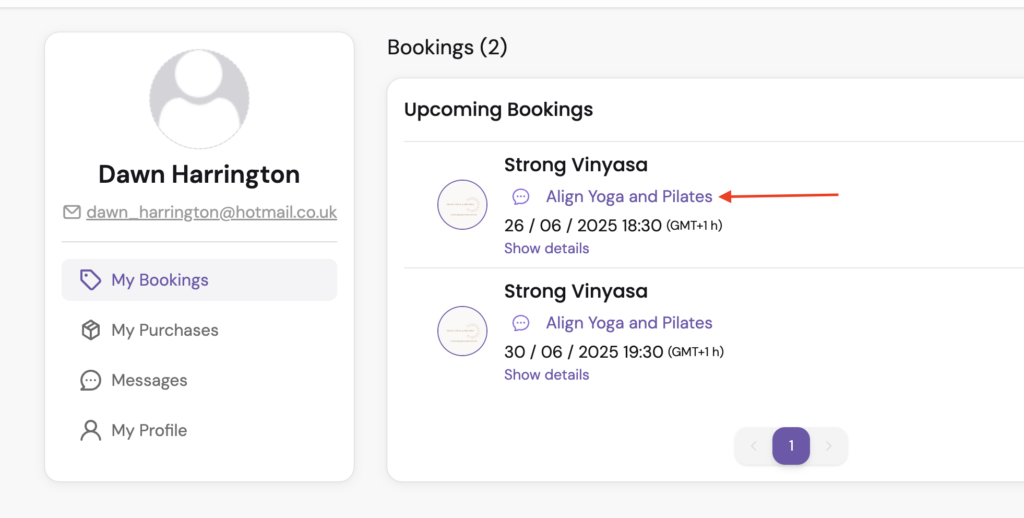
To buy a new package:
- Log in to your ZenPass client portal.
- Go to either:
- “My Bookings” or
- “My Purchases”
- Click on your practitioner’s name – this will take you to their public booking page.
- On their page, browse available classes, services, or packages.
- Choose your preferred listing and complete your booking and payment securely.
Frequently Asked Questions
Q: Do I need to rebook my appointments?
A: No. Any future sessions you had booked through the previous platform will already appear in your ZenPass portal.
Q: I had a prepaid package. Will that still be available?
A: Yes. Your remaining sessions and credits will be available and visible in your account.
Q: Will I still receive reminders?
A: Yes! You’ll now receive automated email (and sometimes SMS) reminders directly through ZenPass.
Q: What if I need to reschedule or cancel?
A: You can do that directly from your portal — just log in, go to your upcoming session, and follow the options provided (depending on your practitioner’s rescheduling policy).
Need Help?
If you have any trouble logging in, seeing your sessions, or navigating the portal, you can:
- Contact your practitioner directly, or
- Reach out to ZenPass Support at: contact**@zen-pass.com**
We’re here to make the transition easy and stress-free.
Pro Tip:
How to Add ZenPass to Your iPhone Home Screen
Make it quick and easy to access your ZenPass account by saving it to your iPhone’s home screen. Here’s how:
Step-by-Step:
- Open Safari on your iPhone.(This only works in Safari, not Chrome or other browsers.)
- Log in to your ZenPass client portal or open your practitioner’s booking link.
- Tap the Share icon (a square with an upward arrow) at the bottom of the screen.
- Scroll down and tap “Add to Home Screen.”
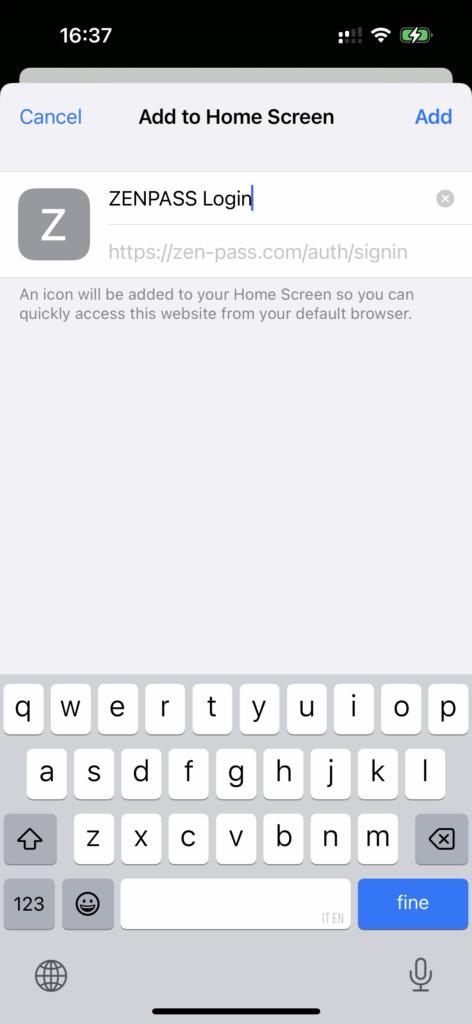
You can rename the icon if you like (e.g. “ZenPass” or your practitioner’s name), then tap “Add.”
You’ll now see the ZenPass icon on your home screen — just like an app. Tap it anytime to manage your bookings, view sessions, or contact your practitioner.
Leave a Reply