- Go to Your ZenPass Settings
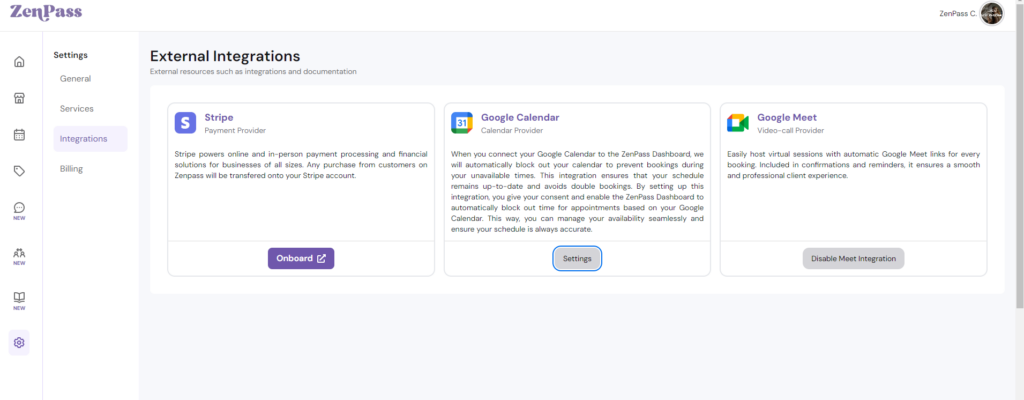
- Navigate to Settings > Integrations in your ZenPass dashboard

- Connect Your Google Account
- Click on “Sync Google Calendar” and sign in with the Google account you use for scheduling.

- Grant all necessary permissions, including access to manage events.
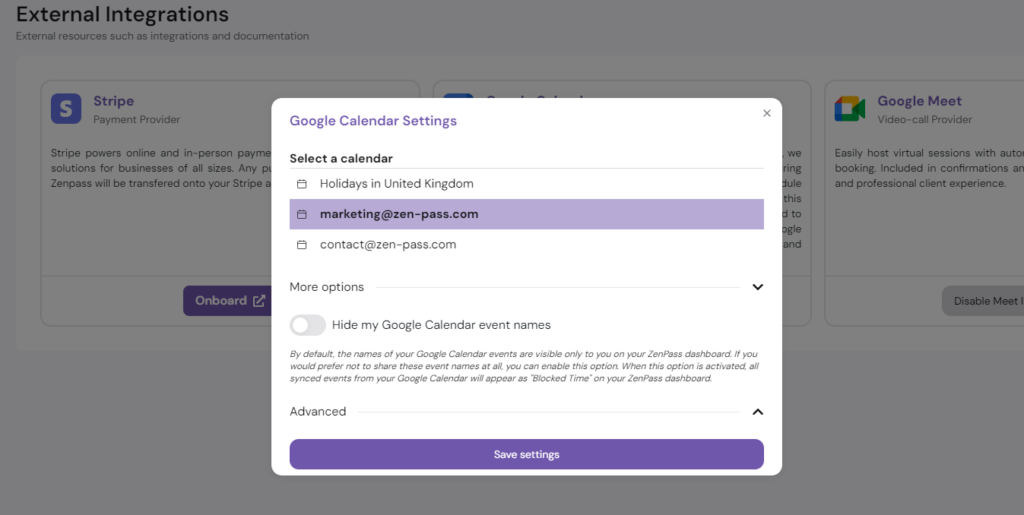
- Select the Correct Calendar
- Choose the specific Google Calendar you want to sync with ZenPass.
- If you manage multiple calendars, ensure the correct one is selected to avoid conflicts.
- Yuo can choose to opt in to hide the Google Calendar Names
- Set Your Availability
- ZenPass will pull in your existing events to block out unavailable time slots.
- Adjust your availability in ZenPass Calendar to ensure clients book at the right times.
Common Pitfalls & How to Avoid Them
- Not Granting Full PermissionsEnsure you allow ZenPass to read and write events, or it won’t update your availability correctly.
- Syncing the Wrong CalendarIf you manage multiple Google Calendars, double-check that you’ve selected the right one in ZenPass settings.
- Google Calendar Events Not Showing in ZenPassMake sure your Google Calendar events are marked as “Busy”—only busy events block off time in ZenPass.
- Duplicate AppointmentsAvoid manually adding ZenPass bookings to Google Calendar, as this can create duplicate entries. On your booking confirmation email, you will see a Cal Invite that you can easily add on any type of calendar – not only GCal.
- Delays in SyncingGoogle Calendar may take a few minutes to update. If changes don’t appear, try refreshing your ZenPass calendar.
Leave a Reply